JWT Authentication with Symmetric Encryption in ASP.NET Core
JWT Authentication is becoming one of the most used authentication types in modern web applications or services. This article covers the JWT Authentication with a Symmetric Key in ASP.NET Core. In the first part, there will be a short introduction into what Symmetric Key represents and the second part contains the prerequisites for this project and the actual implementation of this authentication type.
This article is the first article from of series of two, the second one will contain the authentication with an Asymmetric Key using a certificate.
Introduction
JWT Token is a common way of creating access tokens that can contain several claims (e.g. Username, Roles). JWT Token means JSON (JavaScript Object Notation) Web Token. Every JWT Token has the following structure:
- Header, containing the encryption algorithm;
- Payload, containing custom Claims, plus at least two required claims:
exprepresenting the expiration time when the Token will become unavailable;iator Issued at Time, the time when the Token was created;
The times are formatted using the Unix Timestamp format (e.g. 1582784721).
- Signature, representing the encoded header, plus
a dot, plus the encoded payload, plus a secret key. The concatenated result will be run through the encryption algorithm specified on the Header to validate the Token.
If you want to read more about JWT Token, this comprehensive paper covers all the concepts: https://tools.ietf.org/html/rfc7519.
Symmetric Key
The Symmetric Key is used both for signing and validation. For example, let’s say the John wants to share a secret with Jane, when the secret is told, John also tells Jane a password - the key - in order for the secret to be understood. In this way, John - the identity provider or the service - ensures that his secret is well kept by using the given password.

Setup
ASP.NET Core 3.1 will be used for this project. Microsoft also offers a great package that provides all that is needed to create a JWT Token-based authentication. The package is called Microsoft.AspNetCore.Authentication.JwtBearer, this is the only package that the project needs, and can be found here: https://www.nuget.org/packages/Microsoft.AspNetCore.Authentication.JwtBearer.
Creating a secret key
The signing and validation key will be a user secret key. ASP.NET provides the user secret key feature to store all the confidential data that doesn’t have to be committed or shared outside the user or developer environment. For the production or testing environments, the keys need to be store in a cloud vault, like Microsoft Azure offers through Key Vault - https://azure.microsoft.com/en-us/services/key-vault/ -, but this will be a topic for another article.
Firstly, the project needs to be initiated for using user secrets, by running the following command in the project folder:
Then the user secret key is added, using the following command:
This command will add to the secrets.json file the AppSettings:EncryptionKey key with the value POWERFULENCRYPTIONKEY.
If there are multiple values for the AppSettings then this key can become more readable by using a JSON format like:
The POWERFULENCRYPTIONKEY will be encoded in an array of bytes and then this binary will be Base64 encoded, this is required for both signing and validation.
Startup
In the ConfigureServices method from the Startup class, the AppSettings section needs to be read. To read a type from the configuration file, a class must be created, so for the AppSettings section an equivalent class needs to exists, as is shown below. This class can be seen as a Data Transfer Object, which contains plain properties.
After the section is read, the EncryptionKey needs to be converted into bytes.
On line 9 the Authentication service is added into the App container, this service is responsible, with the managing Authentication settings, like IssuerSigningKey or LifeTimeValidation.
For this step, an extension method is created called AddAuthentication, which receives the service and the signingKey converted earlier.
From line 11 to 14, the services are configured for the Dependency Injection, we will return to the implementation of these services in a moment.
Let’s return to the AddAuthentication method:
The authenticationOptions need to configure the Authenticate and Challenge Schemes, in order to verify that the endpoint(s) which receives a JWT Token will go through the validation step, as is described below starting from line 12. The same Schema will be seen on the endpoints that use the AuthorizeAttribute.
Then the JwtBearer is added to the Authentication process, using the following properties:
SaveTokenis self-explanatory. It’s used to persist the Token into a local storage. The token will be valid even if the service restarts, so its lifetime is different from the application;ValidateAudienceandValidateIssuermust be used for the service to skip or to validate the Audience or the Issuer. The Audience refers to the server or the Identity Provider, in this case our ASP.NET Service. And theIssuerrefers to the client(s) that makes HTTP request(s). For the sake of this example, both are setfalse. Please note that even if you don’t want to validate theAudienceor/and theIssuerthese values must be set;ValidateIssuerSigningKeyneeds to be set totrue, in order to validate the received Token;- For
IssuerSigningKeywill use theSymmetricSecurityKey, the same approach will be also used when the Token will be created. LifeTimeValidatoris important if the generatedTokenhas set an expiration time.
All the JWT Bearer Options can be found on the Microsoft website: https://docs.microsoft.com/en-us/dotnet/api/microsoft.aspnetcore.authentication.jwtbearer.jwtbeareroptions.
The LifeTimeValidator handler is checking if the expiration date is greater than the current Date, as follows:
After the services were configured, the Authentication and Authorization middleware must be added to the App pipeline in the Configure method.
UserCredentials
User’s Credentials will be used as a Data Transfer Object, this class will be received on the authentication endpoint and sent to the AuthenticationService. It’s a plain class that contains only the Username and the Password of the user.
AuthenticationService
The AuthenticationService is used like a middleware which receives the UserCredentials from the Controller, validate them using the UserService and if the credentials are valid, it creates a Token using the TokenService. Both the User and Token services are injected on the constructor.
UserService
For the sake of this example, the UserService contains a list of users created on the constructor. In a real-life scenario, this will be read from a storage or from a service.
This is more like a UserValidation service, but to better illustrate that it also reads the users, the UserService name will be kept.
The ValidateCredentials method checks if the username and password pair exists, and if it doesn’t it will throw the InvalidCredentialsException which will be caught on the Controller.
TokenService
TokenService is receiving on the constructor the AppSettings, which will be used on the GetTokenDescriptor method to set up the Token.
The public GetToken method is used to get the token description, to create the Token and write it into a string, that will be returned to the calling service, in this case to the AuthenticationService.
On the GetTokenDescriptor method, the token is constructed. In this method, the ExpirationTime and SigningCredentials are set. Because the Claims are not in the main focus of this article, I will create another one, in which I will explain how the Claims can be set on the Token and how they can be used.
All the Token Descriptors can be found on the Microsoft website: https://docs.microsoft.com/en-us/dotnet/api/system.identitymodel.tokens.securitytokendescriptor.
AuthenticationController
Now, all we have to do, is to create an AuthenticationController which receives the UserCredentials and uses the previously created AuthenticationService.
On the constructor the AuthenticationService is injected, to be used on the Authentication endpoint.
The authentication endpoint accepts HTTP Post requests, receives the UserCredentials as previously mentioned and uses the AuthenticationService to authenticate and create the Token.
If the credentials are valid, then the endpoint will return an OK HTTP Status code and the generated token. Otherwise, if the InvalidCredentialsException is thrown, the Unauthorized HTTP Status code is returned.
ValidationController
The purpose of the ValidationController is to check that the signing process is working, in order to validate the Token.
You may notice that the Validate endpoint has the AuthorizeAttribute which has on its constructor the same AuthenticationSchemes as was set on the Authentication service.
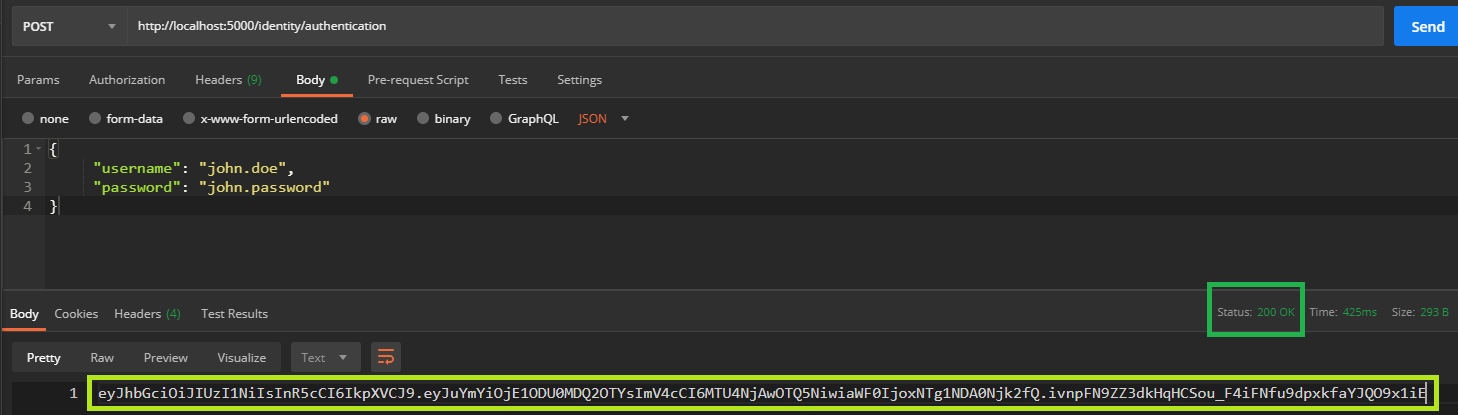
The result
Firstly, the happy flow for the AuthenticationController is tested, so we’ll provide the correct combination of the username and password, in order to receive the token.
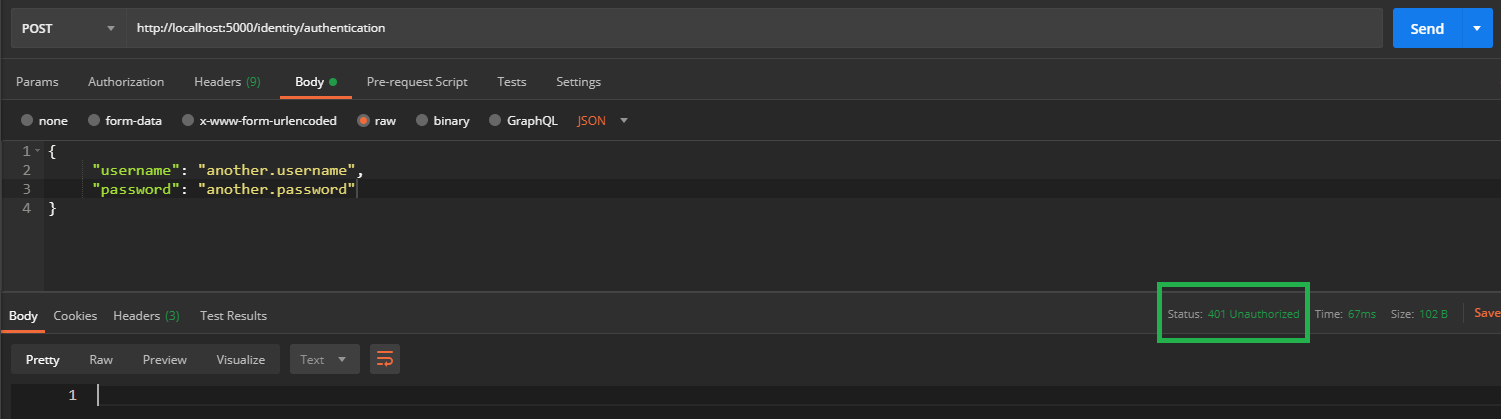
Let’s test with credentials that are not correct, the response should be Unauthorized.
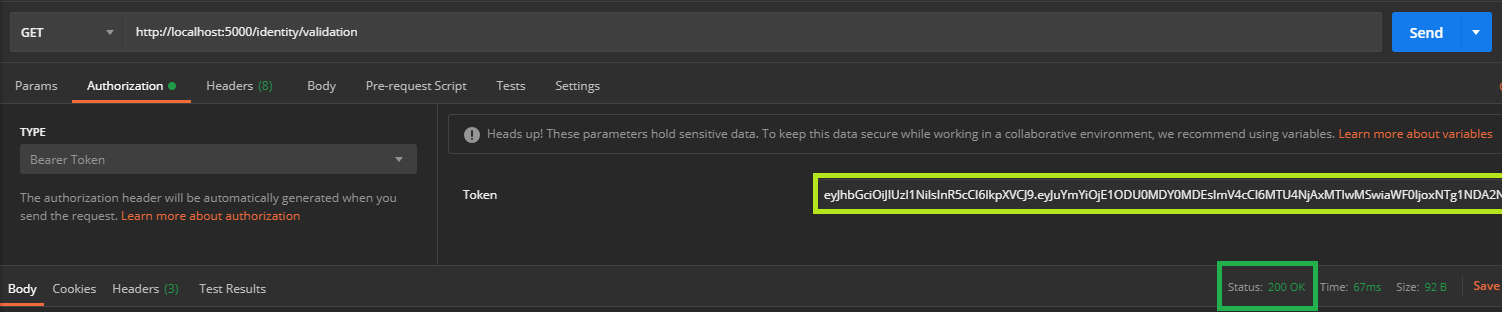
And secondly, the generated token needs to be tested using the Validation controller. The first test will be with the generated token, to see that the validation is passed.
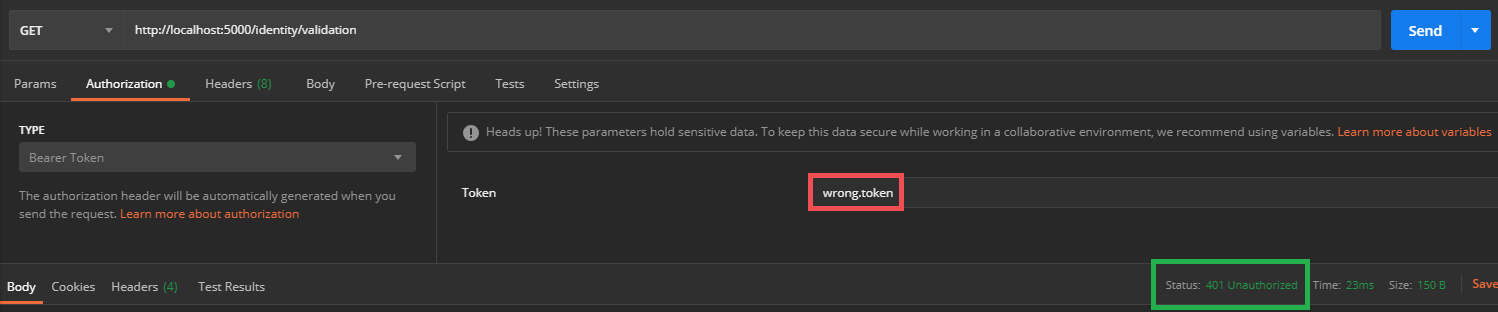
And the second test is when the wrong token is provided for validation.
The source code from this article can be found on my GitHub account: https://github.com/StefanescuEduard/JwtAuthentication.
Thanks for reading this article, if you find it interesting please share it with your colleagues and friends. Or if you find something that can be improved please let me know.