RabbitMQ Producer with Docker in .NET
This is the first article from a series of four, where I will explain each RabbitMQ graph node, the environment setup with Docker and the Producer creation in .NET.
Introduction
RabbitMQ it’s a messaging system that uses AMQP (Advanced Message Queue Protocol) to deliver messages between communication levels. The main idea is that RabbitMQ uses the following 4 layers: Producer, Exchange, Queue and Consumer to send messages over AMQP.
The AMQP it’s delimited in the following three zones:
The
Producersends a message to theMessage Broker.The
Message Brokerconsists of at least oneExchangeand at least oneQueue. Then theExchangesent the message to theQueue.And the
Consumerreceives the message from theQueue.
The Exchange can be one of four types in order to control the messages to the Queues. That’s a great way to handle messages when the system has multiple Exchanges and uses a Queue for multiple purposes (i.e. a Logger(Producer) send a log using a Service(Exchange) to a PersistenceAPI and an AuditAPI both using the same Queue, but both APIs saving the log in the same Database(Consumer)). Maybe that’s a silly example but I want to describe a possible way of using a single Queue with multiple Exchanges. And the can be easily reversed, the configuration can be whatever you wish, at least it will also have sense and respects the RabbitMQ’s concepts.
To understand how messages are sent in this system, firstly the roles of the routing and binding keys needs to be explained. So the routing key will be attached to message and sent to the Exchange, the Exchange will determine in which direction to send the received message based on its routing key and the binding key between the Exchange and the Queue. The binding key is also known as the routing pattern.
Topology
In the image below is the topology created with http://tryrabbitmq.com, which is a nice tool that helped me understand the core concepts of RabbitMQ.
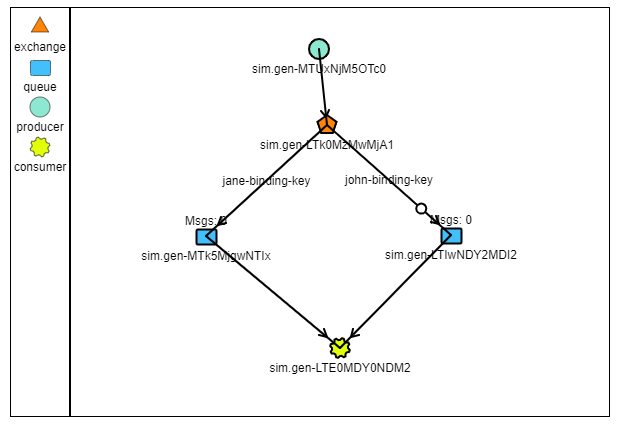
This example will also be used to create the RabbitMQ topology using .NET Core.
Docker setup
RabbitMQ can be installed locally without Docker, but I like to use Docker because is much faster and it’s a lot easier to make changes without breaking too many things.
In order to run RabbitMQ on Docker, we need the RabbitMQ Server and the Management Plugin, more information about the RabbitMQ images can be found here: https://hub.docker.com/_/rabbitmq.
Firstly the RabbitMQ image needs to be downloaded locally with the following command:
I recommend the Powershell or the Git Bash terminal to be used instead of CMD. This command will bring the latest version of RabbitMQ. To check that the image was pulled correctly, the docker images needs to be run. The following entry should be displayed after the command was executed:

After the image was downloaded, the RabbitMQ container can be created using the following command:
If you are new into the Docker world, this command will start an instance of the RabbitMQ image inside a container. And a container you can see it as a VirtualMachine that has all the packages needed to expose our required application.
The --detach parameter means that the container will run in the background, but we still can control it if is needed.
The --name parameter assign a name to the container to be easily identifiable. I choose the rabbitmq-blog name just for this article, but you can give it a name much more intuitive.
The --publish parameter will publish the container using the specified port, the first one is the port that we are expecting to access locally, and the second one is the container port. For this example, the container needs only two ports, the AMQP port (5672) and the Management port (15672). All available ports are listed here: https://www.rabbitmq.com/networking.html#ports. By default the Management plugin supports the 15672, you can leave it like that or it can be changed, read more about this here: https://www.rabbitmq.com/management.html.
And the last argument is the RabbitMQ image. Using the colon (:) specify which version of that image to be used.
Multiple RabbitMQ containers can be linked using the network command:
This command will create a network that can be used to link the containers and needs to be specified when the container is created, with the --network parameter in the docker run command.
To check that the containers are running, the docker ps command can be used. In the following image is the RabbitMQ container that was just started.

RabbitMQ Management it’s a nice tool to monitor and manage the entire topology, it can be accessed from http://localhost:8080.
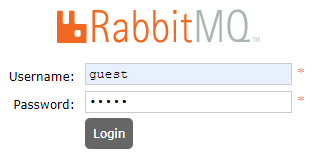
The credentials are guest and guest, those can be changed later.
After I will show how the Exchange can be created in .NET, I will return to the Management page, because the Producer can’t be seen on the Management page. The message published will be seen when will be received by the Exchange.
Creating the Producer
All the RabbitMQ nodes will be created as a Console App in .NET Core. The project only needs the RabbitMQ.Client package available on nuget, but will also install some dependencies that are required as well.
Setting the connection
Firstly the connection to the RabbitMQ Server must be established using the container hostname and the default credentials.
The ConnectionTimeout property is used to avoid the protocol operations time out, that’s why the following code is running in an infinite loop, I wanted to produce a message every time on a new or on the same routing key.
User interaction
Then, in the while loop, the user is constantly asked to introduce the routing key and the message that will be published.
Creating the communication channel
To create the connection between the Exchange and the Producer, the connection that was set earlier must be created and the communication channel needs to be opened, that’s what the first and the second line does.
Then the BasicProperties are created for starting an elementary channel. These properties can be used to specify the Persistence type or the Expiration time until the message will be deleted if no Consumer will receive it; but there are many more and you can check them all here: https://www.rabbitmq.com/dotnet-api-guide.html.
On line 9 the message is published to the Exchange with the routing key and with the BasicProperties that were created. I preferred to choose a constant name for the Exchange just for this article, this Exchange name will be also used for the other nodes.
All code from this article can also be found on my Github account: https://github.com/StefanescuEduard/RabbitMQ_POC. There is the entire Solution, but stay close, there will be an article with explanations for each project.
On the next article I will explain the Exchange.
Thanks for reading this article, if you find it interesting please share it with your colleagues and friends. Or if you find something that can be improved please let me know.