RabbitMQ Queue with Docker in .NET
This is the third article from a series of four about RabbitMQ Queue. The first part contains a brief introduction into the Queue concepts and in the second part, each line of the code is explained. You can check the first article where the RabbitMQ core concepts are presented and also the environment setup with Docker and the Producer are explained step by step.
Introduction
The RabbitMQ Queue is positioned in the Message Broker section with the Exchange, and can be seen as buffer storage, that receives messages through a stream based on the binding key from the Exchange which also receives the messages from one or many Producers. They are acting like a Queue Data Structure, that can be enqueued and dequeued, using the FIFO rule.
Some tips about the Queues, that I find useful are:
- A
Queuename can’t start theamqname, because is restricted by theBrokerfor internal usages. - If the
Queuename is not specified a random one will be assigned to it. Queueswith the same name can be created on the same channel, by only the last one will be kept.
All the RabbitMQ Queue properties can be on their site: https://www.rabbitmq.com/queues.html.
Creating the Queue
To start creating a Queue firstly the connection to the RabbitMQ server should be built using the ConnectionFactory; is the same setup as in the previous article about RabbitMQ Exchange using a URI. But in the first article where the Producer is created, the connection was created using explicit properties of ConnectionFactory (i.e. Hostname, UserName and Password).
Connection setup
As you can see in the below chunk code, all these properties are embedded into one Uri instance.
ConnectionTimeout property was set to its maximum value because I didn’t want the connection to expire, but this is just for this article purposes. If you are interested to find all the ConnectionFactory properties, they are well documented here with one example: https://www.rabbitmq.com/releases/rabbitmq-dotnet-client/v3.2.4/rabbitmq-dotnet-client-3.2.4-client-htmldoc/html/type-RabbitMQ.Client.ConnectionFactory.html. This is the documentation for version 3.2.4 when you read this article the RabbitMQ Client for .NET may be updated, so it’s possible that some properties may be changed, deprecated or removed.
Developer input
You may wonder why the user or the developer input is involved in this, is because this series of articles about RabbitMQ is more educational rather than a solution-oriented approach. So I wanted to replicate one to one the http://tryrabbitmq.com/ concept of learning the basic principles of RabbitMQ using .NET.
Thus, after the connection to the RabbitMQ Server was built, the user is asked to enter the number of Queues that he wants to create and to provide for each Queue a name and the routing key.
Connection establishment
When the required properties are entered, for each Queue a Connection and a communication Channel will be created. After that, the Queue is declared, and the bound to the Exchange that has the same name for the entire solution (i.e. test-exchange). If the creation and the binding were ended successfully, then a message is prompted informing the user that the Queue was created.
QueueDeclare parameters
Let’s dig a little bit deep into the parameters of the QueueDeclare:
queueit’s self-evident that it refers to theQueuename;durablerepresents the lifetime of theQueuein theBroker, if it’s set to false theQueuewill end when theBrokerdoes too;autoDeleteis used to specify the lifetime of theQueuebased on its subscriptions. TheQueuewill be deleted if the lastConsumersubscribed to it, unsubscribes;argumentsare used to sent information about theQueue(e.g. length limit) to theBroker;
QueueBind‘s parameters are self-explanatory, the first one refers to the queueName, the second to the exchangeName and the last one to the routingKey.
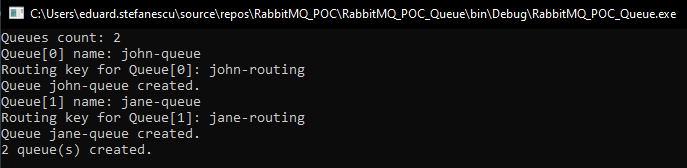
The result
After the Queues are created, a message is prompted to the user with how many Queues were created.
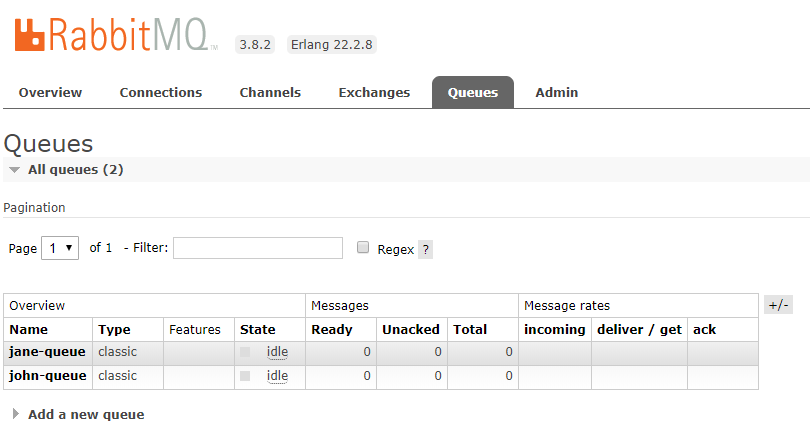
The created Queues can also be seen on the RabbitMQ Management page.
Now, all we have to do is to create the Consumer, and the entire topology will be ready to be used. The Consumer will be created in the next article, this being the last one from this series.
Thanks for reading this article, if you find it interesting please share it with your colleagues and friends. Or if you find something that can be improved please let me know.